Build Guide

    The 12-Stage Sauna Build

    From level base to first löyly — the complete UK self-build sequence for outdoor cabins, barrels, and indoor conversions.

    The 12-Stage Sauna Build
    1

    Design & Site Selection

    Duration: 1–2 weeksCost: £0–£500

    Pick a site that drains well, sits 2m+ from boundaries, and ideally faces a view. Decide outdoor cabin, barrel, pod, or indoor conversion. Sketch internal benching to suit how many people will löyly together.

    Detail

    • Aim for ~1.2m³ of cabin volume per bather. A 2m × 2m × 2.1m cabin (~8.4m³) comfortably seats 3–4 on two-tier benching.
    • Two-tier benching is the holistic gold standard: feet on the lower bench (~45cm), body on the upper (~90–105cm) so head sits in the hottest steam zone.
    • South or west aspect maximises evening sun on the changing area; orient the door away from prevailing wind.
    • If indoor: aim for at least 2.0m ceiling, dedicated extract fan, and a tiled wet area outside the door.

    Checklist

    • Confirm permitted development / planning route
    • Sketch external footprint and internal bench layout
    • Mark heater position and flue route
    • Plan electrical supply or stove location
    • Check ground conditions and drainage

    Pro Tips

    • Build a cardboard mock-up of your benching at full scale — sit on it, lie on it, get the heights right.
    • Indoor variation: line the route from sauna to cold plunge / shower with non-slip tile, not timber.
    2

    Foundations & Base

    Duration: 2–4 daysCost: £200–£1,500

    An outdoor sauna needs a level, ventilated base. The three popular options: paving slabs on type-1 sub-base, concrete pad, or screw piles with a treated timber subframe. Avoid sitting timber directly on damp ground.

    Detail

    • Paving slabs over 100mm of compacted MOT type 1 is the simplest DIY base for a 2×2m cabin.
    • Screw piles (Stop Digging, GroundPlug) give a ventilated air gap underneath — best for damp sites and reversible if you ever move.
    • If using a concrete pad, slope it 1:80 away from the cabin and incorporate a perimeter drain.
    • Allow at least 50mm air gap between the base and any timber bearer.

    Checklist

    • Excavate and level area to 100mm below finished height
    • Lay and compact MOT type 1 sub-base
    • Set damp-proof course / EPDM strip on top of base
    • Level treated timber bearers (or barrel cradles)
    • Confirm base is square and level (max 3mm/m)

    Pro Tips

    • Lay a strip of EPDM or DPC between concrete/slabs and any timber — it stops capillary rise dead.
    • For barrel saunas, the supplied cradles MUST sit on a perfectly level base — even a 5mm tilt will warp the staves over time.
    3

    Frame & Structure

    Duration: 3–5 daysCost: £600–£2,000

    Build the wall and roof frame from kiln-dried 70×45 or 95×45 CLS at 400–600mm centres. Treated timber for the sole plate only — the rest stays untreated as treatment chemicals off-gas at sauna temperatures.

    Detail

    • Use 95×45mm studs if you're going for 70mm of insulation depth + service void.
    • Pitch the roof at minimum 15° for water runoff — a single-pitch (mono) roof is the easiest DIY option.
    • Build wall panels flat on the deck, then raise and brace. Plumb and square first, fix permanently after.
    • Frame the heater alcove with extra studs to take the heater bracket and any heat shielding.

    Checklist

    • Cut and assemble four wall panels
    • Raise, plumb, and brace temporarily
    • Fix sole plates to base with M10 bolts
    • Install double top plate, lapping at corners
    • Frame roof rafters at 600mm centres
    • Frame door and any window openings

    Pro Tips

    • Pre-drill and screw — far easier than nailing for a small cabin and lets you correct mistakes.
    • Leave a 25mm service void on the inner face for cables and the vapour foil — your future self will thank you.
    4

    Sheathing, Membrane & Roof

    Duration: 2–3 daysCost: £400–£1,500

    Sheathe the outside, wrap in a breathable membrane, then get the roof watertight. UK weather is unforgiving — get to dry envelope as fast as possible.

    Detail

    • 9–12mm OSB3 or plywood sheathing, staggered joints, screwed at 150mm centres at edges.
    • Wrap in a breathable membrane (Tyvek Housewrap, Solitex Plus). Tape all overlaps and around openings.
    • Roof options: EPDM rubber single-membrane (excellent for low pitch), corrugated steel, cedar shingles, or felt for budget builds.
    • Always overhang rafters 300–450mm to keep cladding dry.

    Checklist

    • Fix sheathing to walls and roof
    • Install breather membrane, taped at overlaps
    • Fit roof underlay or EPDM
    • Install drip edges, fascia, and any flashings
    • Check shell is fully weathertight before continuing

    Pro Tips

    • EPDM rubber is the quiet hero — single sheet, 50-year lifespan, no joints to leak.
    • Don't skip the overhang on the door wall: it stops rain blowing in every time you open up.
    5

    Insulation & Vapour Foil

    Duration: 1–2 daysCost: £300–£900

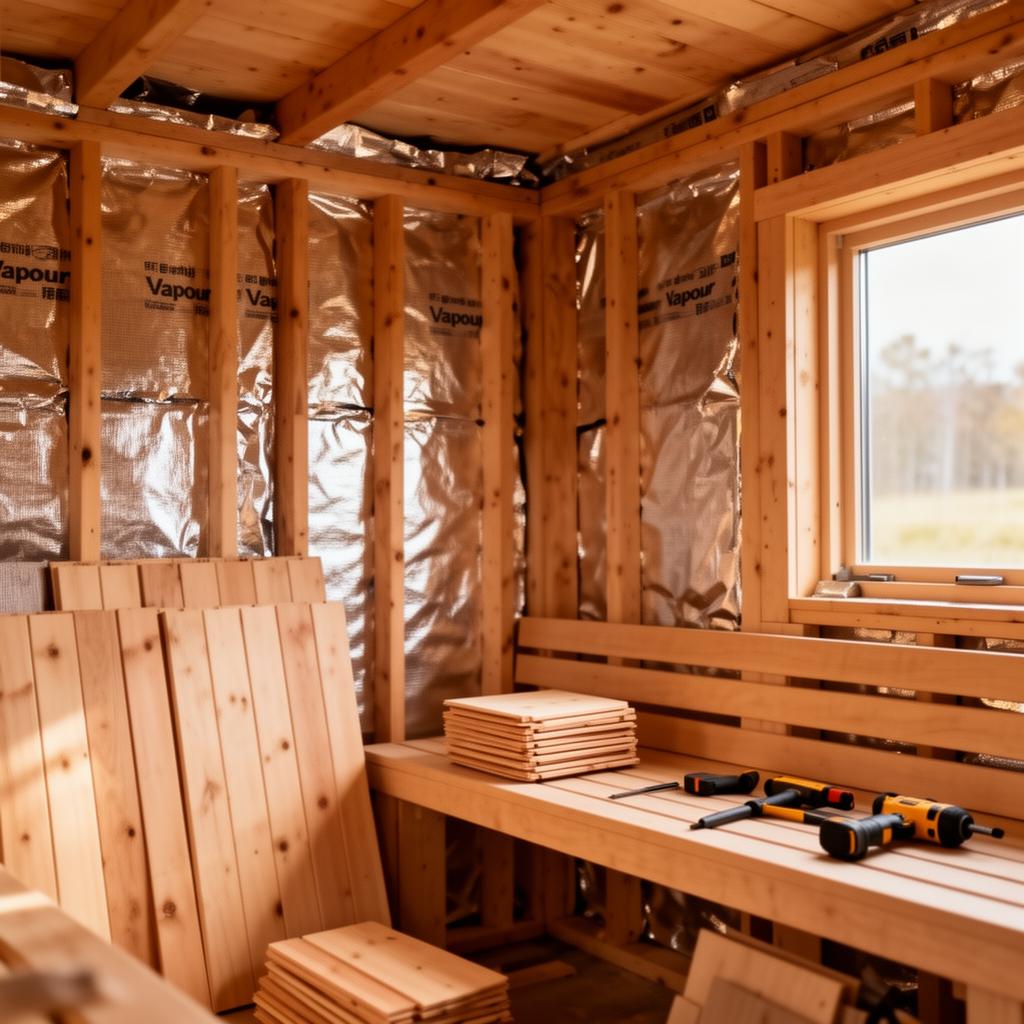
    This is the make-or-break stage. A sauna runs at 80–100°C with humidity spiking when you throw water on the stones. Without a perfectly sealed aluminium vapour foil, that moisture will saturate your insulation and rot the cabin from the inside.

    Detail

    • Mineral wool or Rockwool 50–70mm between studs — both handle high temperatures (Rockwool to 200°C+).
    • AVOID PIR/Celotex inside a sauna cabin — the foil facing degrades and the foam can off-gas above 80°C.
    • Install a continuous aluminium foil vapour barrier (e.g. Thermo-Hanf SaunaFolie, IsoFleece) on the warm side. Tape ALL joints with aluminium foil tape.
    • Eco alternative: sheep's wool with a separate aluminium foil layer works beautifully for breathable, holistic builds.

    Checklist

    • Friction-fit insulation full depth between studs
    • Insulate ceiling FIRST and most generously — heat rises
    • Install aluminium foil vapour barrier across entire warm side
    • Tape every seam and penetration with aluminium tape
    • Leave a 20–25mm batten gap between foil and inner cladding

    Pro Tips

    • The 25mm batten gap behind the inner cladding is non-negotiable — it lets the cladding dry and prevents resin pop.
    • Insulate the ceiling to a higher standard than the walls — losing heat through the ceiling kills löyly.
    6

    Electrics & Heater Wiring

    Duration: 1 day (electrician)Cost: £300–£900

    Run the dedicated heater circuit, lighting, and any control cables before the inner cladding goes on. In the UK, this MUST be done by a Part P registered electrician for any fixed installation.

    Detail

    • 6kW heater: 32A dedicated circuit on 6mm² T&E from consumer unit, RCD protected.
    • 8–9kW heater: 40A circuit on 10mm² cable.
    • Sauna lights must be IP54 rated and rated for sauna use (typically max 60W incandescent or LED equivalent, fitted low — not on the ceiling).
    • External controller or under-bench thermostat: run low-voltage cable in heat-resistant sleeving.

    Checklist

    • Run dedicated heater circuit in correct cable size
    • Run lighting and control cables
    • Use heat-resistant cable (silicone, 180°C) inside the sauna
    • Junction boxes outside the sauna, never inside
    • Electrician issues Part P certificate

    Pro Tips

    • Always run cables through the cooler bottom third of the wall — never across the ceiling.
    • Plan a single isolator switch outside the cabin for safety and easy maintenance.
    7

    Heater & Flue Installation

    Duration: 1–2 daysCost: £700–£3,500

    The heart of your sauna. Choose between wood-fired (authentic, off-grid friendly) or electric (instant, low-maintenance). Wood stoves need a HETAS-certified flue install — non-negotiable.

    Detail

    • Electric heaters (Harvia, Huum, Sentiotec): wall or floor mount, fill with the recommended weight of igneous stones (olivine, peridotite, vulcanite).
    • Wood stoves (Harvia M3, Huum Hive, Narvi NM): need 125mm twin-wall insulated flue, correct clearances, heat shield, and a HETAS register entry.
    • Stones must be loaded loosely, not packed — heat and steam need to circulate. Re-stack them yearly.
    • Add 15–25kg more stones than the heater minimum for richer löyly.

    Checklist

    • Mount heater per manufacturer clearances (typically 50–100mm from walls)
    • Install flue with correct clearances (HETAS install for wood)
    • Fit heat shield behind/around stove
    • Load stones loosely from largest at bottom to smallest at top
    • Test fire wood stoves outdoors first to burn off coatings

    Pro Tips

    • Don't skimp on stones — Huum and Harvia branded stones are pre-washed and the right shape; bagged 'sauna stones' from B&Q often shed dust.
    • Wood-fired feels more 'alive', but if you sauna more than 2× per week, electric will pay back in convenience.
    8

    Inner Cladding & Benches

    Duration: 2–3 daysCost: £500–£2,000

    The wood you sit and breathe against. Use heat-stable, low-resin softwoods — never pine in the upper bench area. Aspen, alder, abachi, thermo-aspen, and Western red cedar are the holy quartet.

    Detail

    • Inner walls and ceiling: 14–17mm tongue-and-groove softwood, fixed via secret-nailing or stainless steel sauna clips on battens (creating that 25mm air gap behind).
    • Benches: thicker timber (38–42mm), spaced 8–10mm for airflow and drying. Round all edges generously.
    • Top bench depth: 60cm so you can lie down comfortably. Distance to ceiling: ideally 105–120cm.
    • Bench supports use stainless steel or timber pegs — never carbon steel screws on the seating surface.

    Checklist

    • Fix horizontal battens to studs, leaving 25mm air gap
    • Clad walls vertically (T&G), starting from bottom
    • Clad ceiling in same direction as door swing
    • Build two-tier benching with rounded edges
    • Install duckboard floor with 20–30mm gaps for drainage

    Pro Tips

    • Western red cedar smells incredible but is the priciest. Thermo-aspen is the modern favourite: stable, near-black, and very resin-free.
    • Sand all bench edges to a 5mm radius minimum — your thighs will notice.
    9

    Door, Glass & Ventilation

    Duration: 1 dayCost: £300–£1,500

    A sauna door is always full toughened glass with no metal handle on the inside, hinged to open outward. Ventilation is the secret to a comfortable session and a long-lived cabin.

    Detail

    • Standard glass door: 8mm toughened, 1900 × 700mm, magnetic catch (no latches that could trap a bather).
    • Inlet vent: low, behind/below the heater (50mm × 200mm minimum).
    • Outlet vent: high on the opposite wall, with a closable slider.
    • Indoor variation: hard-duct the outlet to an external wall — don't dump warm humid air into your house.

    Checklist

    • Install glass door with timber handle inside, optional metal outside
    • Cut inlet vent low, near heater
    • Cut outlet vent high, opposite wall, with slider
    • Test airflow with a smoke pencil or candle
    • Caulk all gaps with high-temp sauna sealant (NOT silicone)

    Pro Tips

    • Bronze-tinted glass cuts glare and looks atmospheric on dark winter evenings.
    • Crack the outlet vent open during a session — the steam circulates better and you'll sweat more efficiently.
    10

    Cold Plunge, Shower & Surround

    Duration: OngoingCost: £200–£3,500

    The holistic ritual is hot → cold → rest → repeat. Build the cold component into your design from day one, even if it's just a stock-tank plunge or a hose-fed barrel.

    Detail

    • Stock-tank plunge: 200L galvanised tank, ~£150, holds enough cold water for short dips.
    • Cedar plunge tub or full chiller (Lumi, BlueCube): £1,200–£3,500, season-independent.
    • Outdoor shower: simple gravity-fed bag for off-grid; or T into mains via a frost-protected outdoor tap.
    • Decking around the cabin gives you a barefoot transition zone — use grooved larch for slip resistance.

    Checklist

    • Choose plunge format (tank, tub, or chiller)
    • Plumb in any mains water and waste
    • Install outdoor shower or rinse station
    • Build deck or gravel surround for barefoot use
    • Add a relax/cool-down bench out of direct sun

    Pro Tips

    • A simple 200L stock tank kept in shade hits 8–12°C year-round in the UK — the cheapest, most authentic cold plunge.
    • Don't underestimate the cool-down phase — that's where parasympathetic recovery happens. Build a comfortable spot to sit.
    11

    External Cladding & Treatment

    Duration: 2–3 daysCost: £400–£2,000

    The face your sauna shows the garden. Larch, cedar, or thermo-pine on a ventilated rain screen. Treat the OUTSIDE only — never the inside.

    Detail

    • Vertical battens (25mm) over the breather membrane create the rain screen.
    • Cladding board choice: UK-grown larch (silvers naturally), Western red cedar (premium), thermo-pine (dark, dimensionally stable), or shou sugi ban (charred — striking and rot-proof).
    • Use stainless steel ringshank nails or secret-fix systems. Galvanised will eventually weep rust streaks.
    • External oil (Osmo UV-Protection-Oil, Sansin) preserves colour if you want to keep the warm tones; leave untreated for the silver-grey patina.

    Checklist

    • Fix vertical battens at 600mm centres
    • Install cladding boards from bottom up with 5mm gaps for movement
    • Cap exposed end-grain with flashing or a drip mould
    • Fit corner trims and door surround
    • Apply external treatment if desired (NOT on inside surfaces)

    Pro Tips

    • UK-grown larch from a local sawmill is 30–50% cheaper than merchant stock and supports British forestry.
    • Burnt cedar (shou sugi ban) is the maintenance-free choice — char it once, brush off the loose carbon, and it'll outlast you.
    12

    First Fire, Curing & Ritual

    Duration: 1 weekCost: £0

    Don't bathe in your new sauna on day one. New stones, fresh wood, and the heater itself need a slow cure to drive off oils, residues, and any moisture trapped in the build.

    Detail

    • First three firings: heat to 80°C with vents fully open and no water on the stones — burns off heater coatings and dries the timber.
    • Fourth firing onwards: introduce löyly gradually, throwing small ladles of soft water to bed the stones in.
    • Smoke test all electrics and check the flue draw on a calm day before a full session.
    • Establish a maintenance ritual: sweep duckboards weekly, deep-clean benches monthly, restack stones yearly.

    Checklist

    • Three dry firings to 80°C with vents open
    • Inspect for any resin weeping, hot spots, or smoke leaks
    • Final electrical test and certification
    • First ritual session with friends — chase it with cold water and fresh air
    • Take photos before the cedar starts to silver

    Pro Tips

    • Light a beeswax candle in the corner during the first proper session — old Finnish tradition that smells incredible.
    • Keep a small bucket of soft, filtered water beside the heater. Hard tap water leaves white scale on the stones.